Best low-impact cardio options for home
Discover 5 effective low-impact cardio options for home workouts that protect your joints while boosting fitness. Transform your health journey with these sustainable exercises for
When rowing at home, many people make common technique mistakes that reduce workout effectiveness and increase injury risk. The most frequent errors include using incorrect body sequence, rushing the recovery phase, improper body positioning, misunderstanding damper settings, and poor hand positioning. Making these small adjustments to your rowing form can dramatically improve your workout efficiency, helping you get better results while keeping your joints safe. Proper technique transforms rowing from merely pulling a handle to an effective full-body workout.
Proper rowing technique isn’t just about looking good on your indoor rowing machine—it directly impacts your workout results and long-term joint health. When you row with incorrect form, you’re not only diminishing the effectiveness of each stroke but potentially setting yourself up for discomfort or injury.
Many home rowers develop habits that seem minor but significantly affect their performance. These include hunching the back, rushing through movements, or relying too heavily on arm strength instead of engaging the powerful leg muscles.
The beauty of rowing lies in its full-body engagement—nearly 85% of your muscles activate during a proper stroke. However, this benefit is only fully realized when using correct technique. By identifying and correcting common mistakes, you’ll transform your rowing sessions from merely pulling a handle to truly efficient workouts that deliver maximum results with minimal joint stress.
The proper rowing sequence follows “legs-back-arms” during the drive phase and “arms-back-legs” during the recovery. This sequence ensures optimal power generation and prevents energy waste during your stroke. Getting this order wrong is one of the most common mistakes that diminishes your rowing efficiency.
During the drive (the working phase), start by powerfully pushing with your legs while keeping your arms straight and back firm. Once your legs are nearly extended, hinge at the hips to lean back slightly (about 11 o’clock position). Only then should you bend your arms to pull the handle to your lower ribs.
For the recovery, reverse this sequence exactly: extend your arms forward, swing your torso forward from the hips, and then bend your knees to slide forward. This creates a smooth, controlled movement that properly distributes work across your muscle groups.
Rowing out of sequence—like pulling with your arms too early or bending your knees before your hands pass over them—reduces power and increases strain on smaller muscle groups. Remember that roughly 60% of your power should come from legs, 30% from your core, and only 10% from your arms.
Rushing the recovery phase is a mistake that undermines your rowing efficiency. The recovery should actually take twice as long as the drive, creating a 1:2 ratio that allows proper preparation for the next power stroke. When you rush this phase, you compromise your positioning and reduce overall workout effectiveness.
Many home rowers instinctively speed through the recovery because it feels like “dead time.” However, this phase serves crucial purposes: it allows momentary muscle recovery, enables proper body positioning for the next stroke, and helps establish a sustainable rhythm. Racing back to the catch position often results in poor positioning and a weak subsequent drive.
To correct this common mistake, consciously slow down your recovery by counting “one” during your drive and “two-three” during your recovery. Focus on maintaining smooth, controlled movements rather than rushing to achieve a higher stroke rate. This patient approach will actually improve your overall performance and reduce strain on your lower back.
Remember that good rowing isn’t about how many strokes you can squeeze into a minute—it’s about making each stroke as efficient and powerful as possible. Quality always trumps quantity on the rowing machine.
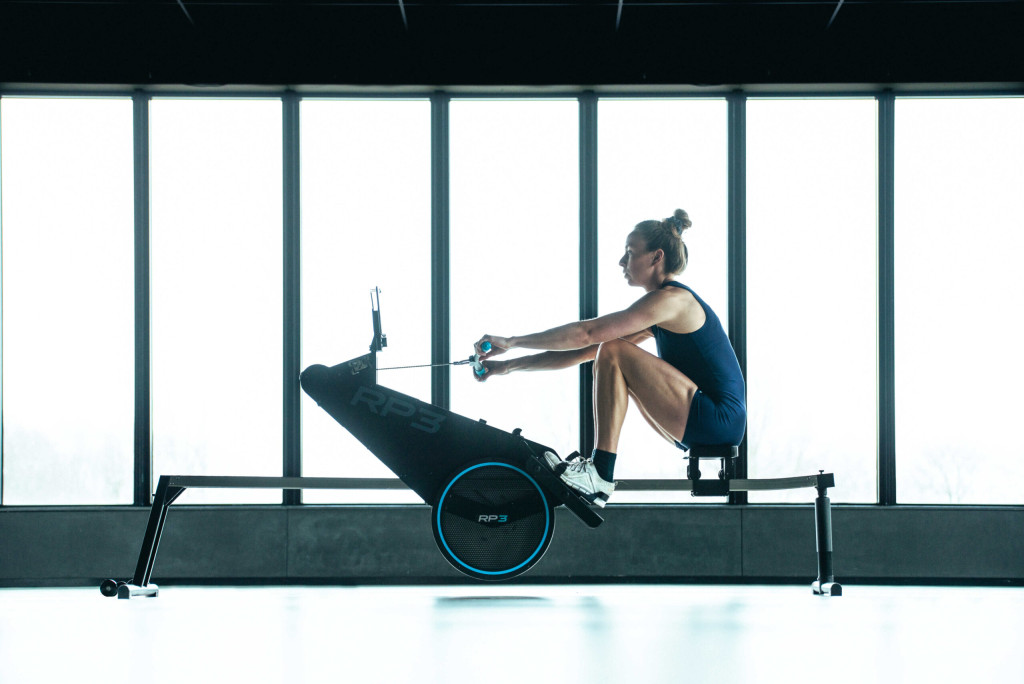
Proper body positioning on a rowing machine starts with correct foot placement, neutral spine alignment, and appropriate grip. Your feet should be secured with straps across the widest part of your feet, and the foot stretcher height adjusted so your knees don’t rise too high at the catch position.
For optimal posture, sit tall on the seat with a neutral spine—neither hunched forward nor overly arched. Your shoulders should be relaxed and down, away from your ears. Many beginners make the mistake of rowing with tense, elevated shoulders which leads to unnecessary neck and upper back strain.
When gripping the handle, hold it with fingers rather than palming it, and maintain a straight line from elbow to wrist. Your grip should be firm but not white-knuckled, with wrists flat rather than bent. At the catch position (start of the stroke), your shins should be nearly vertical and your arms extended, but avoid overreaching which can strain your lower back.
During the finish position, avoid leaning too far back beyond the 11 o’clock position, as excessive layback puts unnecessary stress on your lower back. Your elbows should pass close to your body as you pull the handle to your lower ribs—not up toward your chin or down toward your lap.
Many home rowers misunderstand damper settings, believing higher settings (8-10) automatically provide a better workout. In reality, the damper setting controls airflow and affects how rowing feels, not necessarily workout intensity. Most experienced rowers actually use settings between 3-5 for optimal technique development.
The damper setting on a rowing machine is similar to gears on a bicycle—it changes the feel but doesn’t determine how hard you work. Higher settings create a heavier feel similar to rowing a large boat in water, while lower settings simulate a sleeker racing shell. Your personal technique and effort ultimately determine calorie burn and fitness benefits.
New rowers often choose high damper settings thinking it’s more challenging, but this can actually reinforce poor technique by allowing momentum to mask improper sequencing. Lower settings require more precise technique and can help develop better rowing form. They also reduce strain on your back and are generally more suitable for longer workouts.
Rather than defaulting to the highest setting, experiment with different levels to find what allows you to maintain proper form while achieving your workout goals. Most fitness-focused rowers will benefit from settings between 3-5, especially when learning proper technique.
To avoid wrist and hand pain while rowing, maintain a relaxed grip with flat wrists and proper handle technique. The most common cause of discomfort is over-gripping the handle and bending the wrists during the stroke, which creates unnecessary tension and strain.
Hold the handle with your fingers rather than your palm, creating a hook-like grip where your fingers wrap around while your thumb lightly caps the end. This natural grip position reduces tension and allows for better control. Many beginners make the mistake of gripping the handle too tightly, which quickly leads to forearm fatigue and hand blisters.
Keep your wrists flat and in line with your forearms throughout the entire stroke. Avoid flexing them up or down, as this creates stress on the joint. When you pull the handle to your body, think of your hands as simple hooks connecting you to the machine rather than actively pulling tools.
If you’re experiencing persistent discomfort, check that you’re not hunching your shoulders or incorrectly sequencing your stroke. Pulling too early with your arms rather than initiating with legs puts excessive strain on smaller muscle groups including your hands and wrists. Consider using chalk or investing in rowing gloves if blisters are a problem during longer sessions.
An effective rowing warm-up should include mobility work for key joints, progressive rowing with technique focus, and dynamic stretching. Many home rowers make the mistake of either skipping warm-ups entirely or doing only static stretches, missing crucial preparation elements that improve performance and prevent injury.
Start with 2-3 minutes of light mobility exercises targeting the ankles, hips, spine, and shoulders—the primary joints involved in the rowing stroke. Simple movements like ankle circles, hip rotations, gentle spinal twists, and arm circles prepare these joints for the full range of motion required in rowing.
Next, perform 3-5 minutes of progressive rowing, starting with very light pressure and gradually increasing intensity. Use this time to focus on technique elements like sequencing, rhythm, and posture. Many rowers make the mistake of immediately jumping into high-intensity work without allowing their body to adapt to the movement pattern.
Include specific attention to your breathing pattern during warm-up. Synchronize your breath with your stroke: exhale during the drive phase when you’re exerting force, and inhale during the recovery phase. This breathing rhythm helps establish good habits that will carry through your entire workout.
Avoid static stretching before rowing, as it can actually decrease power output. Instead, save deeper stretches for after your session when your muscles are thoroughly warmed.
Improving your home rowing experience comes down to mastering proper technique through consistent practice and attention to detail. By addressing the common mistakes we’ve discussed—from stroke sequencing and recovery pacing to body positioning and equipment settings—you’ll transform your rowing sessions into more effective, enjoyable workouts.
Remember that rowing is a skill that develops over time. Be patient with yourself and focus on quality rather than quantity, especially when you’re starting out. Even small adjustments to your technique can yield significant improvements in your efficiency and results.
Regular self-assessment is valuable—consider recording your rowing form occasionally to spot any technique issues that might be holding you back. Many rowers are surprised to see what their actual form looks like compared to what they think they’re doing.
At RP3 Rowing, we design our dynamic rowing machines specifically to help you maintain optimal form. Our machines move with you, providing a more realistic rowing experience while reducing strain on your joints. This dynamic movement helps reinforce proper technique and makes it easier to identify and correct common mistakes, giving you the most effective and sustainable home rowing experience possible.
If you’re interested in learning more about the benefits of rowing, reach out to our team of experts today.
Discover 5 effective low-impact cardio options for home workouts that protect your joints while boosting fitness. Transform your health journey with these sustainable exercises for
Discover 5 effective low-impact exercises that protect your back while maintaining fitness intensity. Learn proper form techniques to strengthen your spine without risking injury.
Discover 5 effective home workouts that build strength without stressing your joints. Learn fluid movement techniques for pain-free exercise that delivers results while protecting your
Discover effective low-impact fitness strategies that build strength and cardio health without damaging your joints. Learn sustainable workout techniques for long-term health and injury prevention.
Discover 5 effective full-body low-impact workouts perfect for beginners that protect your joints while building strength and fitness. Start your sustainable exercise journey today!
Discover how low-impact fitness creates sustainable health benefits without joint pain. Learn 5 full-body workouts that deliver results while preserving your body for decades of
Discover why low-impact workouts deliver powerful fitness results without joint damage. Learn 6 key benefits and find the perfect exercise for sustainable daily fitness that
Discover why low-impact training on recovery days accelerates muscle repair, prevents injuries, and boosts long-term fitness gains. Learn optimal activities and avoid common recovery mistakes.
Discover why rowing machines deliver a complete workout while protecting your joints. Engage 85% of your muscles with zero impact stress—perfect for fitness enthusiasts of
Discover effective low-impact exercises perfect for returning to fitness after breaks or injuries. Learn 5 joint-friendly workouts that rebuild strength while preventing setbacks on your
Discover how rowing uniquely engages 85% of your muscles while enhancing flexibility in one efficient workout. Build strength and mobility simultaneously without stressing your joints.
Discover 5 low-impact routines that challenge your entire body without stressing your joints. Build strength and burn calories while protecting your knees, hips, and spine.
Discover how consistent low-impact activity delivers powerful physical and mental benefits without joint stress. Build fitness, reduce stress, and improve mobility through sustainable daily movement
Discover why rowing machines offer the ultimate low-impact, full-body workout for home fitness. Get 85% muscle engagement with minimal joint stress—perfect for all ages and
Discover how low-impact exercise protects your joints while delivering powerful fitness results. Learn 5 joint-friendly workouts that maintain mobility and prevent pain as you age.
Discover how to build sustainable low-impact fitness habits that protect your joints while delivering exceptional results. Learn proven strategies for lifelong exercise consistency without pain.
We will send you a personal quote as soon as possible.
As soon as the quote is ready, you will receive a link by email to order directly.